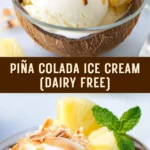
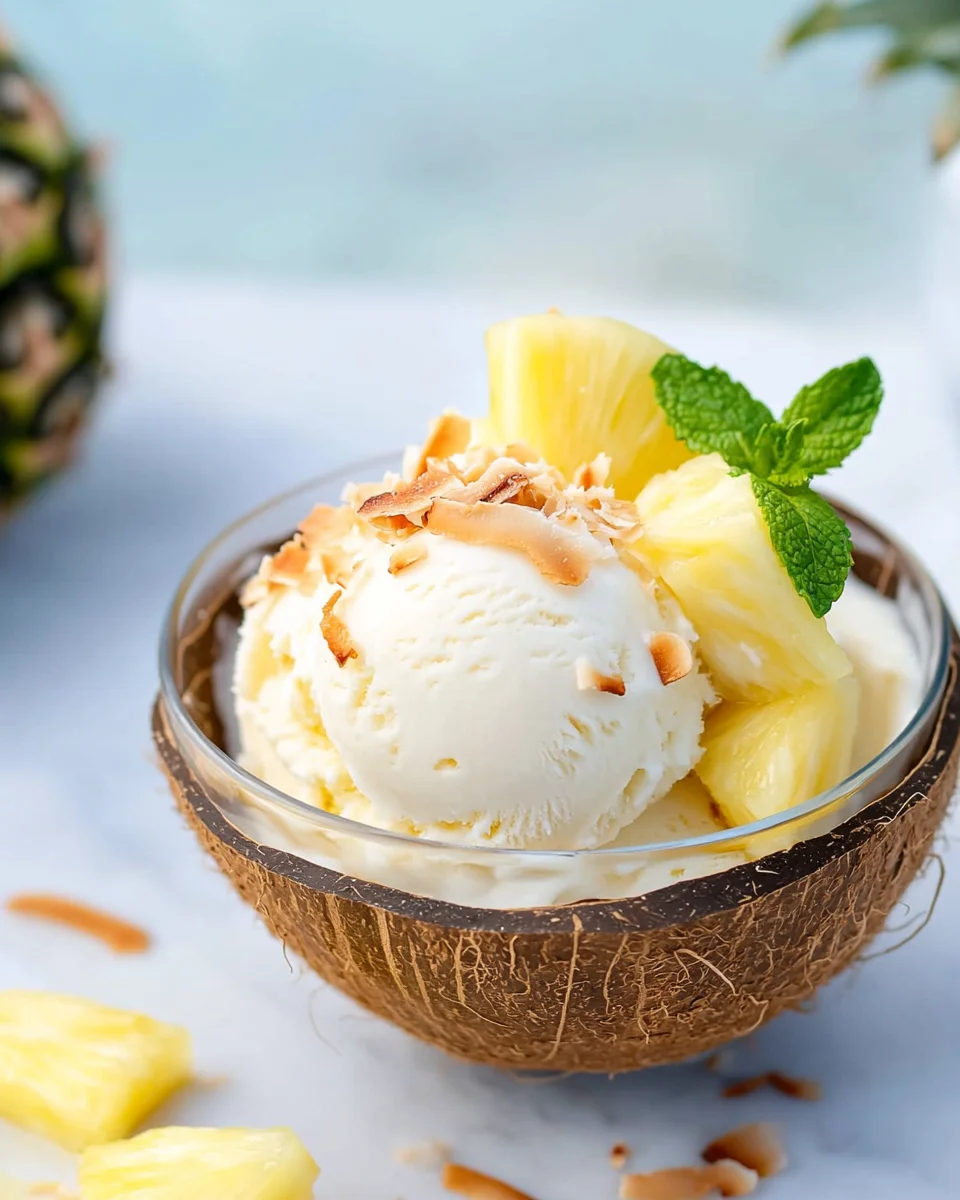
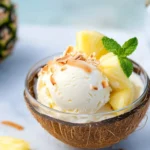
The Piña Colada Ice Cream (dairy free) is a tropical delight that brings the taste of summer to your kitchen all year round. This creamy, dreamy treat is perfect for parties, summer gatherings, or simply enjoying after a long day. With its rich coconut flavor and refreshing pineapple notes, it’s not just delicious but also dairy-free, making it suitable for various dietary preferences. The best part? You can indulge guilt-free!
Why You’ll Love This Recipe
- Quick and Easy: This recipe requires minimal preparation and uses just four ingredients.
- Refreshing Flavor: The combination of coconut and pineapple creates a vibrant tropical taste.
- Versatile Dessert: Perfect as a soft serve or frozen treat, you can enjoy it however you like.
- Healthy Ingredients: Made with natural sweeteners and no added sugars, it’s a wholesome option.
- Dairy-Free Delight: This ice cream is suitable for those avoiding dairy without compromising on taste.
Tools and Preparation
To make the perfect Piña Colada Ice Cream, you’ll need some essential tools in your kitchen. These tools will help streamline the process and ensure a smooth texture.
Essential Tools and Equipment
- Blender
- Ice cream maker
- Measuring cups
- Mixing bowl
Importance of Each Tool
- Blender: A good blender ensures that all ingredients are combined into a creamy mixture without lumps.
- Ice cream maker: This tool helps achieve the ideal texture by churning the mixture while freezing it.
- Measuring cups: Accurate measurements are crucial for balancing flavors and sweetness in your ice cream.
Ingredients
For the Base
- 2 cans full-fat coconut milk (where to buy BPA free coconut milk)
- 2 cups chopped pineapple (canned works too)
- 1/2 cup real maple syrup
- 1 1/2 tbsp fresh lime juice
How to Make Piña Colada Ice Cream (dairy free)
Step 1: Blend the Ingredients
- Place all ingredients into your blender.
- Process until creamy smooth.
- Chill in the fridge for about 30 minutes.
Step 2: Churn in Ice Cream Maker
- Pour the chilled mixture into your ice cream maker.
- Follow the manufacturer’s instructions for churning time.
Step 3: Serve or Freeze
- Serve immediately for a soft-serve consistency.
- For firmer ice cream, freeze for 1-2 hours before serving.
Enjoy this delightful Piña Colada Ice Cream (dairy free) as a refreshing treat any time of year!
⭐ Join Thousands of Happy Customers Who Love These Coffee Scoops!
How to Serve Piña Colada Ice Cream (dairy free)
Serving Piña Colada Ice Cream is a delightful experience that can be enhanced with some creative ideas. Whether you’re hosting a party or enjoying a quiet evening, these serving suggestions will elevate your dessert game.
Tropical Sundae
- Top your ice cream with fresh diced mango and shredded coconut for a tropical twist.
Pineapple Coconut Smoothie Bowl
- Blend the ice cream with extra pineapple and pour it into a bowl. Add your favorite toppings like granola and nuts.
Pina Colada Float
- Combine your ice cream with sparkling water or soda for a refreshing float that’s perfect for warm days.
Fruit Kabobs
- Serve scoops of ice cream alongside colorful fruit kabobs for a fun and vibrant presentation.
Coconut Whipped Cream
- Add a dollop of coconut whipped cream on top of the ice cream for added richness and flavor.
Chocolate Drizzle
- Drizzle melted dark chocolate over the ice cream for a sweet contrast that elevates each bite.

How to Perfect Piña Colada Ice Cream (dairy free)
To create the best Piña Colada Ice Cream, consider these essential tips to enhance texture and flavor.
- Use full-fat coconut milk – This gives the ice cream its creamy texture and rich flavor.
- Chill ingredients – Pre-chilling all ingredients before blending can help achieve a smoother consistency.
- Adjust sweetness – Taste the mixture before freezing; you can add more maple syrup if you prefer it sweeter.
- Don’t over-process – Blend just until smooth to avoid over-aerating the mixture, which can affect texture.
- Freeze in stages – If using an ice cream maker, freeze in small batches to ensure even churning and better consistency.
- Let it soften – Allow the ice cream to sit at room temperature for a few minutes before serving for easier scooping.
Best Side Dishes for Piña Colada Ice Cream (dairy free)
Pairing side dishes with your Piña Colada Ice Cream can make your dessert even more enjoyable. Here are some great options to consider:
- Tropical Fruit Salad – A mix of fresh fruits like kiwi, mango, and berries adds freshness.
- Coconut Macaroons – Chewy macaroons bring out the coconut flavor in the ice cream and provide texture.
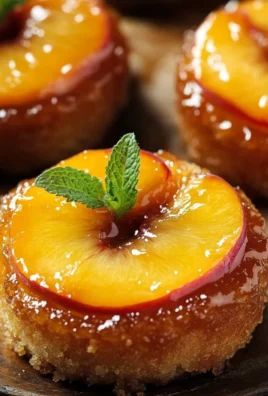
- Grilled Pineapple Skewers – Sweet grilled pineapple enhances the tropical vibe perfectly.
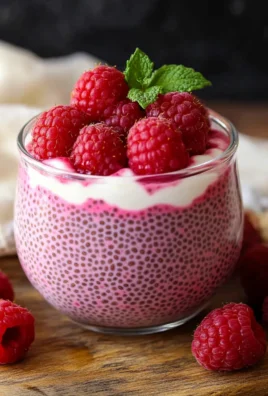
- Chia Seed Pudding – A light pudding makes an excellent contrast to the rich ice cream.
- Banana Bread Slices – The warmth of banana bread pairs well with cold ice cream, creating a delightful combination.
- Cashew Nut Clusters – Crunchy clusters add an extra layer of flavor that complements the creamy treat.
Common Mistakes to Avoid
Making Piña Colada Ice Cream (dairy free) can be a delightful experience, but there are some common pitfalls to watch out for.
- Overmixing the Ingredients: Blending too long can lead to a watery texture. Blend just until smooth to ensure creaminess.
- Skipping Chilling the Mixture: Not chilling the mixture before churning can result in an icy texture. Always chill it in the fridge for at least an hour.
- Using Low-Quality Coconut Milk: Low-fat or non-BPA-free coconut milk may not yield the same creamy results. Opt for full-fat, BPA-free coconut milk for best flavor and texture.
- Not Adjusting Sweetness: Using different types of sweeteners can affect the final taste. Adjust maple syrup based on your preference and sweetness level of pineapples.
- Ignoring Ice Cream Maker Instructions: Each ice cream maker has specific guidelines. Follow yours closely to achieve the perfect consistency.
Refrigerator Storage
- Store in an airtight container.
- Keep in the refrigerator for up to 2 days.
Freezing Piña Colada Ice Cream (dairy free)
- Use a freezer-safe container with a tight lid.
- The ice cream can be frozen for up to 2 weeks for optimal freshness.
Reheating Piña Colada Ice Cream (dairy free)
- Oven: Preheat your oven to 350°F (175°C) and let the ice cream sit out until it softens slightly.
- Microwave: Place a scoop in a microwave-safe bowl and heat in 10-second intervals until desired softness is reached.
- Stovetop: Gently warm on low heat in a saucepan, stirring constantly until softened.
Frequently Asked Questions
How do I make Piña Colada Ice Cream (dairy free) without an ice cream maker?
You can pour the blended mixture into a freezer-safe container and freeze it. Stir every 30 minutes for about 2-3 hours until creamy.
Can I use frozen pineapple for this recipe?
Yes! Frozen pineapple works well and can give your ice cream a thicker, colder texture.
What is the best way to serve Piña Colada Ice Cream (dairy free)?
Serve it immediately as soft-serve or freeze it for 1-2 hours for a firmer consistency. Garnish with fresh pineapple or toasted coconut!
How long will Piña Colada Ice Cream last in the freezer?
When stored properly in an airtight container, it can last up to 2 weeks. For best quality, consume within that timeframe.
Can I customize my Piña Colada Ice Cream?
Absolutely! You can add shredded coconut, rum extract, or even other fruits like mango or banana for different flavors.
Final Thoughts
Piña Colada Ice Cream (dairy free) is not only delicious but also versatile. This recipe allows you to enjoy tropical flavors while accommodating dietary preferences. Feel free to customize it with your favorite toppings or mix-ins! Try making this refreshing treat today – you won’t be disappointed!
Piña Colada Ice Cream (dairy free)
- Total Time: 30 minutes
- Yield: Approximately four servings (1/2 cup each) 1x
Description
Indulge in a creamy, tropical escape with our dairy-free Piña Colada Ice Cream. This delightful treat combines the rich flavor of full-fat coconut milk with sweet pineapple and a hint of lime, making it the perfect dessert for any occasion. Whether you’re hosting a summer gathering or simply treating yourself after a long day, this easy-to-make ice cream is sure to impress. With just four simple ingredients and a quick preparation process, you can create a guilt-free indulgence that caters to various dietary preferences. Enjoy it as a soft-serve delight or freeze it for a firmer texture; either way, you’ll savor the refreshing taste of summer all year round.
Ingredients
- 2 cans full-fat coconut milk
- 2 cups chopped pineapple (canned works too)
- 1/2 cup real maple syrup
- 1 1/2 tbsp fresh lime juice
Instructions
- Blend all ingredients until creamy and smooth. Chill in the fridge for about 30 minutes.
- Pour the chilled mixture into an ice cream maker and churn according to the manufacturer's instructions.
- Serve immediately for a soft-serve texture or freeze for 1-2 hours for firmer ice cream.
- Prep Time: 10 minutes
- Cook Time: 20 minutes (churning time)
- Category: Dessert
- Method: Churning
- Cuisine: Tropical
Nutrition
- Serving Size: 1/2 cup (120g)
- Calories: 210
- Sugar: 14g
- Sodium: 5mg
- Fat: 14g
- Saturated Fat: 12g
- Unsaturated Fat: 2g
- Trans Fat: 0g
- Carbohydrates: 24g
- Fiber: 1g
- Protein: 2g
- Cholesterol: 0mg
Grab This Chef Knife Now - Almost Gone!
Leave a Comment